INTRODUCTION
It was hard before to manage WHMCS menu, for example if you want to add new menu item, change it's place or make it hidden or shown in certain condition, or even to translate the title.
Earlier it required you to know at least the basics of HTML and CSS, or to deal with PHP sometimes.
Now you can do all of this and even more using this module that enables you to do numerous actions like adding unlimited menus and sub-menu items, identifying when and to whom each item will be displayed, add translations to several languages from the same place, changing the order of menu items using Drag-Drop technique, and many more, all of this can be done easily only with few clicks.
Key Features:
- Add Unlimited Menus and Submenu items
- Compatible with WHMCS Template Six and Five
- Compatible with Custom Templates
- Change menu items ordering with Drag-n-Drop
- Add translation to each item easily
- Add additional attributes to each menu item
- Add core system URL from categorized lists, or external URL
- Add icon to each menu item
- Automatically display badge number (ex. Total Active Services, Open Tickets, Due Invoices, etc).
- Choose when to display specific menu item (Visitors, Clients only, or Clients with active products, etc)
- Open URL in the same window or in new window
- Install WHMCS default menu items with one click
INSTALLATION
WHMCS Advanced Menu Manager is like any other WHMCS addon module, to install it please follow this simple steps:
- After Purchasing download the item package from Downloads section.
- Extract package file in your PC hard drive, upload the content of "/Upload_To_Root_Of_WHMCS/" folder to the root of WHMCS installation.
- Go to Admin Area -> Setup -> Addon Modules, then activate "Advanced Menu Manager".
- Now click the "Configure" button to choose who can access/manage this module, then click "Save Changes".
- Done.
MENU GROUPS
Use menu groups to create as many menus that need to be integrated with your website tamplate(s).
We will apply the practical example through the replacement of the "Primary Navbar" of Six template in client area.
ADD NEW MENU GROUP
To add a new group follow these simple steps:
- Go to Admin Area -> Addons -> Advanced Menu Manager.
- To the right of that page, click the blue button "New Group".
- New window will just come out to enter the new group information as follow:
- Group Name, Enter name for this group to make it easy for you to recognize it.
- Template, here's the compatibility part, you need to select the name of your template, or select "Default" if it's not listed.
- Install Default Menu, Use it install WHMCS default menu items, selected between Primary Navbar, Secondary Navbar,
or None to create empty group. - If you need to specify ID or Class name to this group use the "Advanced" tab, this Class name will be applied to the first
<ul>,
ex.<ul class="Group-Class-Name" id="Group-ID"> - Now Click "Add Group" button.
As we are going to create an alternative to WHMCS Six Template Primary Navbar, Please apply the following options:
- Group Name: vSix Primary Navbar
- Template: WHMCS v6 Six Template
- Install Default Menu: Install WHMCS Primary Navbar
Now we have our menu created, and in the following section we going to learn how to integrate it into our template.
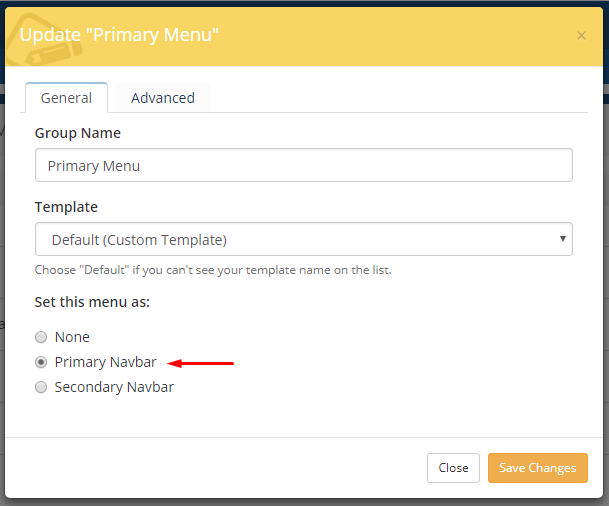
LINK GROUP TO TEMPLATE (INTEGRATION)
Since v1.2.0 there is a functionality to automatically integrate our module with your navbars without the need to edit any template files
all you need to do is to select which menu group should replace the WHMCS Primary or Secondary navbars:
To integrate the menu that you created recently, Follow these steps:
- Open the following file with any text editor program such as Notepad, or Notepad++,
the file is/WHMCS-Path/templates/six/header.tpl - Search for this lines:
<ul class="nav navbar-nav"> {include file="$template/includes/navbar.tpl" navbar=$primaryNavbar} </ul> - Now you need to get the integration code of your menu to place it instead of the previous code,
Go to Admin Area -> Addons -> Advanced Menu Manager, then click on the "Integration Code" button for "vSix Primary Navbar" menu group. - Copy the integration code and place it instead of the 3 lines mentioned in step #3.
- Save your Changes, Done.
MENU LINKS
This section includes the most important advantages of this module, Dealing with menu links will not be easier than that, From one interface you can add as many links as you need, apply changes, sort links with Drag-Drop, add translations, and more.
ADD NEW LINK
To add menu link you need to do the following:
- Go to Admin Area -> Addons -> Advanced Menu Manager.
- Click on the "Manage Menu Items" for the group you need to add menu link in it.
- Click On the "New Menu Item" to add new item.
- For now we are going to specify "Title" and "Target URL" fields, and leave the other options at the default selection.
- Now Click "Save" button.
- Check your client area to see the new link has been added.
- Now you can play with other options available for this menu link and see what happened, as we are going to describe in the following sections.
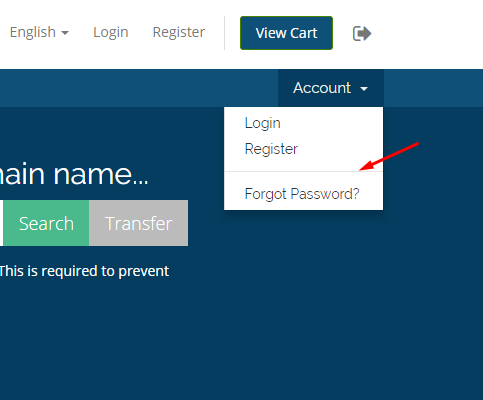
VISIBILITY OPTIONS
This feature allows you to show or hide menu links in certain conditions, Examples of use:
- Display menu link to visitors only, so after logging in this link will go away.
- Display menu link to clients only, so only when client is logged in this menu item will be visible.
- Display menu link if Affiliate system enabled.
- Display menu link if Domain registeration/transfer setting enabled.
- Display menu link if client is registered as affiliate. NEW
- and more..
TRANSLATIONS
Through a single interface you can translate the text of the link to any or all of the languages available in your WHMCS installation.
BADGES
Display account stats inside menu links, The available options is:
- Total Products/Services
- Active Products/Services
- Total Domains
- Active Domains
- Due Invoices
- Overdue Invoices
- Active Tickets
- Credit Balance
- Shopping Cart Items NEW
ICONS
Display descriptive icons inside menu links.
By default WHMCS support Font Awesome Icons, You can place Font Awesome icons using the CSS Prefix fa and the icon's name for example fa fa-life-ring this will be the outcome
These is the icons available for use from Font Awesome.
ADDITIONAL ATTRIBUTES
This feature allow you to add any number of additional attributes to your links, so you can handle it through Javascript, or apply special styling with CSS, etc.
LINKS REORDER
All menu items and their submenus ordering can be changed using Drag and Drop technique, with up to 4 depth level you can move items between easily, no page reload required.
TEMPLATE VARIABLES
Use template variables to display real content from the system and/or Database like logged-in client name, etc.
We have added support for 2 variables until now, and more might be added in future releases, supported variables is:
| Variable | Description |
|---|---|
| {$clientfirstname} | Print logged-in client first name |
| {$clientlastname} | Print logged-in client last name |
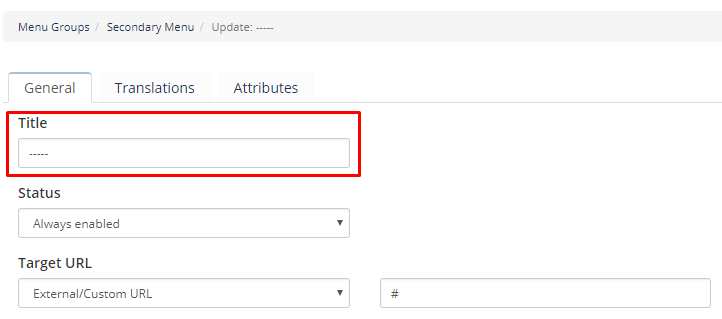
LINKS DIVIDER
Dividers used to separate groups of links in drop-down menus:
to add a divider using our module do the following:
- 1) Add new menu item as normal
- 2) in the title field enter "-----" five dashs without the double quotes.
- 3) Click "Save", and that's it.